menu   Home Book Trailers The Goods Tools About Me  

Search This Blog

Showing posts with label freebie. Show all posts

Who Would Win?

I am always trying to find ways to integrate multiple subjects into one project.  Last year I was introduced to the book series Who Would Win which lends easily to a student based project.  In each book the author chooses two animals to match up against and provides various facts about each.  He does it as a narrative with pictures but then also adds in interesting fact bubbles throughout the book.  Students can complete a checklist of who would win based on various comparisons--- height, fur, speed, etc.  At the end he puts them in a final match up and students are able to see if their predictions are correct.  They are engaged from the beginning!

As a class we decided we would create our very own who would win books.

#1 I started by reading a book to them.  We noticed various non-fiction text features the author uses throughout the book and listed them.  I then let the kids get into pairs and choose one of the other books to partner read.  I gave them a sticky note.. on one side they completed the checklist and on the other they wrote what new features they noticed.  We shared out and added the additions to our list.
#2 I introduced the kids to World Book online. Go to Kids---World of Animals. We talked about how it wouldn't make sense for me to compare a wasp to an elephant, so when choosing animals they would choose from similar species. In World Book they make it easy and have animal selections grouped by land mammals, water, reptiles, etc.  The kids get to select the two animals to compare and it creates an easy format that shows different facts about each.  The program has an easy print button that doesn't use up all of the ink. 
  
 #3 After students got their animals we came back and listed what we thought would be important to include in each book.  I wanted to give them a framework, but all them AMPLE space for creativity. I modeled some of the pieces for the book and how to do the comparisons with math.

Who Would Win Book Pieces
 1.  A cover--- which we modeled after Steve Jenkins layered artwork.  I made them the cover "Who Would Win" pieces and they did the rest.
2.  An introduction posing a question of what would happen if these two animals came across each other.
3.  THREE math comparing measurement using pictures AND words. (We were working on measurement in math so that's how I tied all of this in :))
4.  At least one page of other facts and a map
4.  Include interesting text features from the list--- tales of the tape, facts, etc.
5.  A final battle
6. Checklist of their comparisons

I set out all of the papers and pieces and honestly let them have at it! It took about 2 math blocks and 1 literacy to get it all done.  They were engaged THE ENTIRE time.  I roamed around and helped as needed... but it was all completely independent.  Clearly there were a few stragglers but for the majority that is all the time they needed.

I bound them with binding combs and then the kids had a book sharing party where they rotated around and read each other's books.  They were so amazed with what the other kids had done and just loved them.  I hung them in plastic zip lock bags outside in the hall as a display so that other kids/adults could read them.

Here are some snippets from their work


Here are the files I created for them to make their books.Happy comparing and creating!


I've added pages for to use World Book to compare Countries!  It's all part of my country report back.  Here's a freebie below


Catapult Math

We have been working on engineering and simple machines in science.  I am of the mindset that if we are going to be doing something awesome/fun in one subject- we better try connecting it across the curriculum.

So here is how our Friday went---

First thing this morning kids made catapults using Popsicle sticks.  Check out THIS website for detailed instructions on how to make the catapult.  We tried different amounts of Popsicle sticks but found that having about 8 in the middle works best for getting distance.  :)

I arranged the desk in a large rectangle and I marked the space in one foot increments in the open space using green frog tape.  

After students made their catapults I had 4 students line up on opposite sides of our "field" (8 total). Each student had 3 trials to flip their pom poms the farthest.  Students filled out THIS RESPONSE sheet which includes numerous math operations and questioning- regrouping, measurement, comparing numbers.  

Here's the kids using the catapults! 

                                   
Students had to measure their distance and figure out how many inches it was total.


During literacy we read about the Vikings and watched how people use catapults today.

During science we watched some of the Punkin Chunkin' videos and decided to have our own in class using the pom poms :)  


We flung a few with our catapults... and then decided that using our simple machine levers... aka our arms might be a bit more fun.


Needless to say the kids loved it!  After it dried we voted on a motto-- which was pretty much unanimous and painted it on our art work. We were inspired by Oliver Jeffers as our mentor illustrator :)

My goal is to encourage the kids and make sure that they know.... it doesn't matter if they have flops... those flops leads to successes.  Success has flops-but you have to DO SOMETHING!  We use this motto all day and it helps relieve the anxiety of not doing something perfect... they just have to DO SOMETHING. This now proudly hangs in our classroom.  My question to you is what do you need to do?  What scares the bejesus out of you or makes you anxious that you need to try or move in that direction?  I have 3 big ones on my list that I am actively trying to DO SOMETHING in.... what are yours?!?


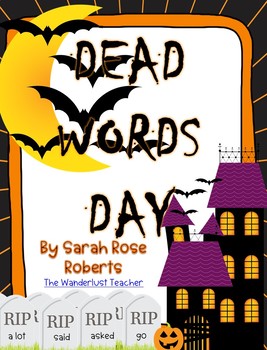
Dead Words Day

My 2nd grade students are really starting to take off with their writing!  The biggest part of craft is using wisdom in word choice-- but often students (and us) choose words that we're comfortable or we just don't know what our options are or take the time to think about them. So to be more intentional about words we had a Dead Words Day, to put the common words to rest and rise up with more interesting words.  Anything to get the students engaged! Let me start off my saying… this by no means is my idea.  I remember doing something like this in grade school and have seen idea on numerous blogs. 


Prior to students coming to class I have them wear all black.  Since I did this on Halloween they assume something is up and get all the more excited.  I made necklaces with words that had the dead words on them.  I had signs around the room that said "The Dead Word Zone" and caution tape on the door.  I copied tombstones onto gray construction for students to add the resurrected words on.  

                                      
I start the day telling them how proud I am of them as writers and explain that as we continue to mature we have to lay to rest what we did when we were just starting writing so that stronger and more powerful writing can emerge. I emphasize that as writers they have the power and to engage readers they need to keep them captivated using strong words. I explain that today we are going to have a memorial for the beloved words we have used so much so that we can resurrect new words into our vocabulary. I then pass out the necklaces and tell each child they are responsible for the memory and new life of that word. Throughout the day they think of words that could replace it. Depending on time and maturity they could do a word hunt in their books, use a thesaurus, etc. 

During literacy I pass out the tombstones and using the words they've collected and/or the resurrected words I've included to create a tombstone for that word. 

I gather students into a circle on the carpet to grieve the word we lost and celebrate what will rise up. Students read the epitaph- after they say the word that we are laying to rest- the rest of the class repeats that word. (reader) “Here lies ‘said’” (whole class) “said” (reader continues on) they drop the word into the bucket and place a flower into in. Depending on weather you could also do this outside and bury the words! 

Throughout the activities you could play “The Twilight Zone” or “The Undertaker” theme song... Along with the classics like “Thriller” After we complete the funeral service, students receive a small tombstone to write their word on it and a new sentence using the resurrected words. We hung those on a bulletin board and below I use the tombstones to create a new word wall so that we can add new words all year to it. I leave a marker so that students can add new words all year-- and boy will they call you out if you use them!  I went to the local craft store to make the tombstones look like a cemetery.  


Here are all of the materials I use in my class

                                              Dead Words Day


Are We There Already?!?!

I just clenched when I saw my calendar on my new iPhone.  It seems to say that I have to report to work in 2 weeks.  Technology these days. Gosh, guess I'll just live in denial, procrastinate, and piddle for at least another week!

I've been trying to change my personality---just a little bit.  I've been working a few hours a week throughout the Summer on getting some of my beginning of the year activities together. I hate having them all over the place (like my personality) so I bought some stupid cute clip art and put them all in one pack.  I will say that this pack is purely selfish for me and my brain, but I'm all for making things....

A lot of these activities can be used for multiple levels and abilities-- I would dare say you could use this K-6 and have pages that correspond with it.  I love having kids do things organically but sometimes you need a sheet in front of them and though I hate to admit it cutesy isn't all bad.  (Thanks Elizabeth Hall)

So here it the pack that is on TPT and then some freebies just because nice will almost always be apart of my personality :)


These things are free--- just like my bad/inappropriate jokes.  


The End of Days and into a Good Time!

I apologize... but don't really mean it for the length and lovely information you are getting in this stellar post. :) 

All year we have been gathering pieces for their writing portfolios.  I didn't have students put in every piece of writing they did, rather they chose what pieces they liked and showed their growth. I had students reflect upon their growth using this form and then put it near the beginning of their portfolio.  It is so powerful for them to reflect and put academic vocabulary to their growth.

We created 3 anchor charts
1.  At the beginning of the year...... I did/did not...
2.  Now at the end of the year I....
3. In the future I would like to....

Writing Portfolio Reflection- FREEBIE


For the cover of their portfolios I cut out 4x6 watercolor paper.  I like using watercolor paper because it does not pill or get misshapen like other thicker papers do.  It also allows the water to not run as much.

I taped around the edges on the desk using my favorite froggie green painters tape to make a frame.  I then gave students masking tape attached to a piece of wax paper with the bottom of the tape hanging off of it.  They chose 1 simple shape that reflected them---sun, heart, star, initials, sport, etc. drew it and cut it off.  Having the tape on the wax paper allowed me to do it whole group and also made it so that they didn't ruin their design because the tape was sticking to their scissors, desks, hair, faces, somebody else, etc. etc. etc. :) 

On my back table I let them use "fancy watercolors" from the tube.  Whole group I showed them different strategies to use--- wet, dry, salt, saran wrap, etc.  It is amazing the textures you can get really easily. 

salt


rubbing alcohol


 plastic wrap


With me we taped their paper down, cut out their shape, and I let them begin to paint.  I thought this was going to be an absolute disaster and chaos... and it couldn't have worked better.  One of the 1st grade teachers is a professional artist and when I told her what I was going to let 7-8 year olds do she thought I was mental (which is partially true).  When I told them that "Mrs. Moore thinks I am crazy for letting 2nd graders use fancy water color and no lines" it fueled them to be that more intentional.  I didn't have a single student need to redo one--- which is nothing short of a diving miracle. After their first coat dried, we peeled back their cut out and painted inside of that. 

I was blown away at what these little artists produced. Start to finish it took about 2 hours to finish everybody with 3 working one the table at a time.

They signed their names in the corners like an artist and then we mounted them on black construction paper.  These became the covers of their portfolios.  I bought clear plastic covers from office depot.  Originally we were going to do binders, but there is something about having it bound together that just finishes it off (though binding them about finished me:)).
On the last day of school they collected them with their parents along with a little goody bag that had a summer review pack, sunglasses, and a sweet treat in them.  I also included all of the book trailers they had made throughout the year into the portfolio as well as a copy of our year end video.


Also, during the last week, I had the students write letters to the upcoming 2nd graders.  These letters will be placed on their desks on the first day of school.  As a class, we made a huge graphic organizer of all they had learned throughout the year- academic, social, technology, fun activities, etc.

From there we brainstormed some sentence starters and I wrote an example in front of them.  They wrote rough drafts, editing with a peer, and then me.  They then taped a pencil to the top of the paper and wrote a little note.

2nd Grade Rocks! Freebie


We even created one last book trailer as a class from our read aloud...The Invention of Hugo Cabret


It is amazing how fast a school year can fly.  I am so fortunate to work with the group of kids, parents, and teachers.  My parents even made me moose cupcakes and painted my new reader's theater a mustard yellow :)

 I miss my kids dearly... but I am glad to be on vacation!!! I am taking the next month to be out West--- hike, bike, chill, and eat.

Here is a video I captured the other day at Hanging Lake in Glenwood Springs, Colorado.  It is crazy how clear the water is


 Top of the Colorado Rockies--- we got thirsty and would fill up our water bottles straight from water coming out of the mountains.


Arrays of Sunshine


We have been busy bees working away on repeated addition, arrays, and into multiplication.
We have been using Miss Giraffe's Arrays Arrays Arrays!
Arrays Arrays Arrays!


We got a little punny and made Arrays of Sunshine.
I had students roll dice, the first number they rolled was the rows, the second the columns.  They drew an array, wrote both repeated addition problems, and then the multiplication problems.


We watched brainpopjr. earlier in the week on arrays and repeated addition and made notes.  I had students draw and cut out a large cloud on a white sheet of paper.  From that they wrote a paragraph about arrays/multiplication on it.

Students had to do quite a bit of work and they turned out super cute!!!

You can get my outlines for the sun here!  

This weekend we were able to celebrate one of my all time favorite couples and their adoption of 3 children.  It is a true honor to be apart of their lives and see how everything has been positioned to bring home these 3 precious lambs.  Laura and Kyle are ridiculously talented, but my favorite part about them is that their home is always open and you feel so safe in their presence. Watching this process of adoption has really enforced the love Christ has for us and how he truly adopts us and makes us His own.